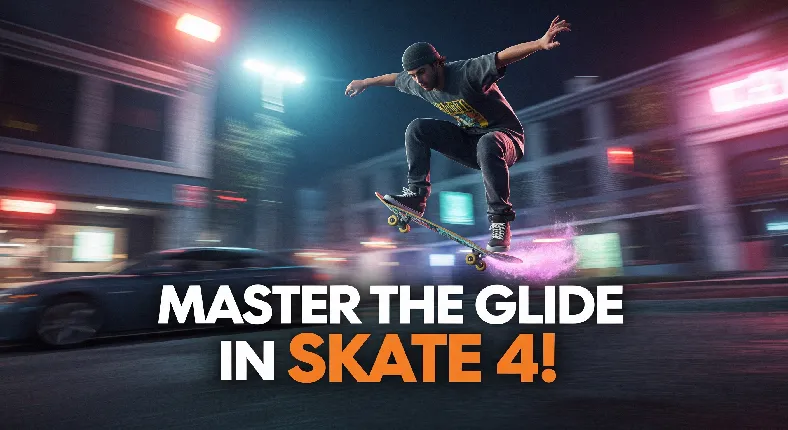
Gliding is the foundation of flow in Skate 4. Whether you’re cruising the streets, chaining tricks, or competing in online sessions, mastering the glide will make your skating look smooth, fast, and effortless. This comprehensive guide walks you from the basics to advanced pro tips — step by step.
Why Learning How to Glide in Skate 4 Matters
In Skate 4, gliding is more than “moving forward.” It’s the way you control speed, build momentum for tricks, and link moves into stylish lines. Players who learn reliable glides can:
- Maintain steady speed without losing balance.
- Set up and land transitions more consistently.
- Create flowy combos that earn higher scores and respect in multiplayer.
- React to terrain changes (hills, rails, gaps) with precision.
Note: Throughout this article we’ll say “glide” to mean the controlled rolling and maneuvers that keep your skater moving smoothly—this includes pumping, carving, manuals, and small adjustments to stance and speed.
Fundamentals: Controls & Settings for a Better Glide
Before practicing, optimize your controls and settings. Small tweaks have an outsized effect on how easy it is to glide:
1. Controller vs Keyboard (PC)
- Controller (recommended): Analog sticks allow nuanced foot pressure and turning. Use a controller for the most natural glide control.
- Keyboard: Still playable but requires key bindings tuned to your playstyle—focus on responsive bindings for turning and balance.
2. Camera & Sensitivity
- Camera distance: Set it slightly further back to see the upcoming terrain and plan your glide line.
- Sensitivity: Lower rotational sensitivity for smoother turns; increase analog deadzone slightly if you feel twitchy direction changes.
3. Stance & Skate Setup
- Stance width: Adjust how your feet are spaced in the skate setup menu—wider stance gives stability, narrower grants quick pivoting.
- Board style: Choose a deck that matches your playstyle—stable decks help with long glides and manuals; light decks favor pop and quick flips.
Pro tip: Save multiple controller profiles (e.g., “Practice Glide”, “Tricks”, “Competition”) so you can switch quickly depending on whether you’re training basic glides or chaining advanced combos.
Core Techniques — Step-by-Step: How to Glide in Skate 4
The essentials break down into five skills: posture, pushing/pumping, carving, manualing, and speed control. Master each independently, then combine.
1. Posture & Balance
- Stand relaxed — knees slightly bent, shoulders square, eyes ahead (not down). This lowers your center of gravity.
- Distribute weight mostly over your front foot when cruising flat ground; shift slightly back when approaching obstacles; move weight forward for acceleration drills.
- Use subtle body lean (tilt hips and torso) to assist turns rather than huge stick twists.
2. Pushing & Pumping
Pushing is how you create forward momentum; pumping is subtle weight shifts inside turns to maintain or gain speed without pushing.
- Start with a few solid pushes to build baseline speed (short, powerful pushes). Don’t overreach — keep pushes consistent.
- When approaching a long curve, pump: compress on the inward side of the curve and extend on the outward side while turning the analog stick gently.
- Coordinate ankle and knee flex — the push should be from your whole leg, not a locked knee.
3. Carving
Carving is angling your board to cut a smooth arc. Carves maintain speed and allow controlled direction changes.
- Use the analog stick to lean into the carve — gentle, continuous inputs are better than quick jerks.
- Combine carve with pumping to prevent speed bleed on longer turns.
- For downhill sections, carve across the slope (slalom-style) to prevent runaway speed and to set up lines.
4. Manuals and Balance Tricks
Manuals (wheelies) are crucial for linking tricks and smoothing transitions. They also conserve speed when landing tricks that would otherwise kill momentum.
- Practice popping into a manual on flat ground: flick the stick/back button to shift weight and maintain small corrections with the analog stick.
- Hold manuals longer by making micro-adjustments — tiny forward/back stick nudges to maintain the pivot point.
- Combine manuals with carving for stylish flow (manual + carve = extended glide with control).
5. Speed Control & Braking
Gliding well requires knowing when to keep speed and when to bleed it off without wobbling.
- Feather braking: Use light brake inputs instead of full-stop brakes to maintain posture.
- Pump instead of push: On flat runs, pumping can sustain speed with less input than repeated pushes.
- Use terrain: Run small downhills to pick up speed then pump through turns to retain it; use slight uphill to naturally slow before tricky landings.
Beginner Drill Routine (15–30 minutes)
Do these drills to turn raw control into muscle memory. Repeat daily or before big sessions.
Drill 1 — Straight-Line Pushes (5 minutes)
- Start on a long flat stretch. Push 6–8 times, then hold steady for 10–15 seconds maintaining posture.
- Work on even pushes — same length and rhythm every time.
Drill 2 — Controlled Carves (5 minutes)
- Find a gentle curving road. Carve left-right repeatedly, focusing on rhythm rather than tightness.
- Pump through each turn to keep speed.
Drill 3 — Manual Holds (5 minutes)
- Pop into a manual, hold for 3–5 seconds, dismount into a smooth carve. Repeat.
- Increase manual time gradually while keeping speed steady.
Drill 4 — Line Practice (10+ minutes)
- Create a simple line: push → carve → manual → small gap/trick → manual exit.
- Repeat the line, increasing speed gradually while maintaining the same flow.
Record your practice sessions if possible. Watching replays shows subtle posture and timing errors you can’t feel in real time.
Advanced Tips: Flow, Combos, and Micro-Techniques
Once you’ve nailed basics, apply micro-techniques to elevate your glide to pro level.
1. Linking Manuals Into Tricks (Manual-to-Flip)
- Pop a small flip out of a manual: maintain manual, pre-wind flick, then release and catch the board in a subtle landing manual.
- Timing is everything — practice the flick while feeling the manual pivot point so momentum doesn’t kill the flip.
2. Speed Conservation After Big Gaps
- Land in a manual immediately after big gaps to reduce speed loss from absorbing impact.
- Use forward-lean on impact to keep your center of gravity over the board.
3. Subtle Camera & Orientation Tricks
Use camera adjustments and manual tweaks to “cheat” visibility and reaction time.
- Lower camera shake intensity if the default makes you lose focus mid-glide.
- During long approaches, angle the camera slightly to the direction of your intended carve to preview the line sooner.
4. Micro-Carve Corrections
Instead of large turns, perform many small corrections with the stick; this keeps the skater stable while still changing heading quickly.
5. Rhythm & Breath
It sounds odd, but rhythm matters. Keeping a consistent cadence in pushes and pumps helps you keep timing on manuals and rotations. Breathe steady — tense breathing causes jerky inputs.
Common Problems & How to Fix Them
Here are frequent issues players face while learning how to glide in Skate 4 and quick solutions.
Problem: Wobbling or Losing Balance During Manuals
- Fix: Reduce manual angle — smaller initial pivot is easier to hold. Practice tiny stick corrections instead of large ones.
- Check controller deadzone — too low may cause twitch; slightly increase deadzone.
Problem: Losing Speed on Carves
- Fix: Add pumping to your carve. Time compressions and extensions with the arc of your carve to regain speed.
- Also check stance width — narrow stance may reduce leverage for strong pumps.
Problem: Over-rotating on Spin Transitions
- Fix: Reduce rotation sensitivity and pre-wind less aggressively. Use subtle rotational stick adjustments paired with a slight manual to land cleaner.
Problem: Difficulty Linking Tricks Consistently
- Fix: Slow the line down and practice the same two-move link until it’s consistent. Use manuals as a “speed buffer” between harder moves.
Pro-Level Practice Lines & Examples
Here are practice lines that build specific glide skills. Run them repeatedly, then mix them up for creativity.
Line A — Flow & Pumping
- Start with 6 pushes → long carve left → pump through curve → manual over small curb → carve right → gentle ollie exit.
Line B — Manual Control & Speed Conservation
- Push → pop into manual across a short flat section (hold 4–5 sec) → spool into a small grind/rail → land in a manual → ride out into a carve.
Line C — Trick Setup & Recovery
- Push → mid-level speed approach → pre-wind and pop into flip trick → land into immediate manual → pump out and carve away.
These lines train you to think of gliding as a long chain rather than separate actions. The goal is to keep energy moving forward — not stopping between steps.
Multiplayer & Competitive Tips
When playing online sessions, smooth glides make you predictable to teammates but impressive to viewers. Here’s how to adapt your glide for online play:
- Less risky lines: In crowded sessions, pick lines with fewer gaps and obstacles to avoid being knocked off course by other players.
- Showcase flow: Use long manuals and linked tricks to impress without gambling big gaps.
- Adapt camera & HUD: Turn off cluttering UI elements so you can better read the stage.
If you’re streaming or posting clips, long smooth glides often get more views than short perfect tricks — audiences love flow.
Controller Layout Recommendations
Below are suggested controller mappings that many top players prefer for a clean glide experience.
Left Stick – Movement / Steering (carve & pump)
Right Stick – Camera / Balance adjustments
R2 / RT – Push / Power (sustained pushes)
L2 / LT – Manual / Balance modifier
X / A – Ollie / Pop
Square / X – Trick modifiers
Circle / B – Brake / Feather brake
Customize these to your comfort. The important part is having separate, easily reachable controls for manual and camera so you can micro-correct without fumbling.
Keyboard Tips (PC Players)
If you play on keyboard, map manual and camera to nearby keys. Use a gamepad for long sessions if possible.
- Map
A/Dto carve andWto push; keep manual onSpacefor quick access. - Consider a controller for better analog sensitivity — gliding feels more natural with analog inputs.
How to Practice Efficiently: Session Plans
Use focused sessions to improve rapidly. Here are sample session plans for different goals.
Session A — Foundation (30 minutes)
- 5 min warm-up pushes
- 10 min carving & pumping drill
- 10 min manual holds and small trick links
- 5 min cool-down run (a long smooth line)
Session B — Advanced Flow (45 minutes)
- 10 min warm-up
- 15 min combo linking drills (manual to flip, carve to manual)
- 15 min high-speed approach and landing control
- 5 min replay review & notes
Always end with a replay review. Note three things you did well and three things to improve next session.
Common Mistakes to Avoid
- Over-pushing: Pushing too hard early burns stamina (in-game momentum) and leads to sloppy lines.
- Ignoring stance: Neglecting stance width or foot placement reduces control on manuals and pumps.
- Keyboard-only mentality: On PC, avoid stubbornly playing without a controller; there’s no shame in switching for better control.
- Rushing trick links: Speeding up combos before you can land them consistently leads to failure — slow and consistent wins.
Customization & Visual Cues to Help Glide
Small cosmetic choices can help you read the game better and thus glide better.
- High-contrast wheels: Makes rotations and wheel contact easier to see on replays.
- Board color: Choose a color that stands out on typical maps so your eye can track the board in the air.
- HUD minimalism: Hide excess HUD elements during practice to reduce distraction.
How to Glide in Skate 4 — Troubleshooting Checklist
If your glide feels off, run this checklist:
- Controller deadzones and sensitivity set to comfortable levels.
- Stance width matches your preferred stability.
- Camera distance allows previewing terrain ahead.
- You’re practicing drills focused on the failing technique (e.g., manual wobble → manual hold drill).
- You reviewed replay footage to identify exact timing errors.
Sample In-Game Goals to Track Progress
Set clear measurable goals. Examples:
- Hold a 5-second manual on flat ground 10 times in a row.
- Complete a pre-planned 10-step line without stops.
- Chain a manual into a flip and another manual successfully 5 times.
Track these in a practice log. Small consistent wins compound fast.
Frequently Asked Questions (FAQ)
Q: How long does it take to learn how to glide in Skate 4?
A: It depends on your prior skating game experience. New players can get comfortable in a few sessions (3–7 hours) and become consistent in 10–20 hours of focused practice. Pros refine micro-skills for months.
Q: Should I use a controller or keyboard to glide?
A: Controller (analog sticks) is strongly recommended for the nuanced inputs gliding requires, though skilled keyboard players can still perform well.
Q: What’s the best way to maintain speed through combos?
A: Use manuals and pumping. Land tricks into manuals when possible and pump through turns instead of pushing aggressively after every obstacle.
Q: Are there specific in-game maps best for practicing glides?
A: Look for maps with long flat stretches plus a couple of curves and a small rail or curb — they’re perfect practice arenas. Create a custom line in free roam and practice it repeatedly.
Q: Do controller vibration settings affect gliding?
A: Minimal vibration helps with immersion; too much can make inputs feel laggy. Keep vibration low if you’re focusing on micro-corrections.
Quick Reference — Step-by-Step Cheat Sheet
- Warm up with straight-line pushes (5–6 pushes).
- Adjust camera & sensitivity for smoother turns.
- Practice controlled carves and pump through arcs.
- Hold manuals for increasing durations (3–10s).
- Link manual → trick → manual and maintain flow.
- Record and review replays; note 3 improvements for next session.
Final Thoughts — Making Glide Part of Your Identity
Learning how to glide in Skate 4 is a long-term craft. Treat it like musical practice: short, focused sessions with consistent repetition yield the best results. Prioritize posture, rhythm, and small corrections over flashy risky moves at first. Once the base is solid, add style and personality — that’s when your glide becomes unmistakably yours.
Ready to level up? Pick one drill from this guide and practice it until it’s automatic. Come back and try the next one — step-by-step growth beats random grinding every time.